Deus Ex Walkthrough – Warehouse District
- Introduction
- Liberty Island
- Battery Park
- Hell’s Kitchen
- Warehouse District
- Mole Tunnels
- Airbase
- 20th Street Warehouse
- Secret MJ12 Facility
- MJ12 Helibase
- Tonnochi Road
- VersaLife
- Hell’s Kitchen 2
- Naval Shipyards
- Cemetary
- Paris Catacombs
- Champs Elysses
- Chateau DuClare
- Cathedral
- Vandenberg
- Gas Station
- Sub Base
- Missile Silo
- Area 51
- Conclusion
- Saves
NYC - Warehouse District
Exit the lift and you will now be on the rooftops. Go round behind the lift shaft and up the ladder. Kill the NSF terrorist sniper on this roof and take his 3 +/- 3 rounds of 30.06 ammo. You will find 12 rounds of 30.06 ammo on the rooftop, leave the ballistic armour. There is another ladder leading up onto a higher roof from this one. Walk over to the base of the ladder and you will get 30 skill points. Climb the ladder and go across to the far side of the next rooftop where you will find a ladder leading down the side of the building. Go all the way down to the ground and then disarm and pick up the 1 LAM which is on the wall down there. Now climb back to the roof again. There is another ladder leading off this roof which should be on your left. Go down this one and then enter the building through the window you find next to the ladder by smashing the glass. As you go along the hallway you will receive another 30 skill points. Leave through the window again and keep going down the steps. One of the levels is broken here and you will have to jump down until you are on the rooftop below. Kill the NSF terrorist here and find 6 rounds of 10mm ammo in the crate. Try not to let the sniper on the roof above hear you doing this, or he will throw a LAM down at you. Now go up the ladder on the West side of this roof and kill the NSF terrorist. You can take 3 +/- 3 rounds of 30.06 ammo from him and 0-1 LAMs (depending on whether he just tried to blow you up with it or not). One of the crates contains 6 rounds of 30.06 ammo. Now use the advertisement board to cross to the neighbouring rooftop and kill the NSF terrorist there too. His body has 3 +/- 3 rounds of 30.06 ammo on it. There is a datacube on some steps nearby. Now return to the lower roof of the previous building you were on by jumping down to it using the plank in the corner of this roof and the chimney below as a step so you don’t take any damage in the drop.
Go through the window of the building you just jumped from (smashing the glass to get in). You will get 20 skill points as you enter and another 30 skill points as you proceed further along the hallway inside. There is a dark room off to one side of the hallway. There is 1 bioelectric cell on the right of the door to the room and another 1 bioelectric cell to the right of the stairs on the lower level as you go down them. Now leave this building by going back through window you entered from. You will need to use one of the small metal crates as a step to get through the window. Go to the South end of the roof and you will see a ladder leading down the side of the building. If you can’t get up onto the wall there then use the ramp by the open window and walk along the edge of the wall to the ladder at the South. Now begin to descend the ladder. Just before you reach the bottom there is a pole sticking out of the wall:
Jump onto this pipe from the ladder and then jump onto the nearby low wall. From here jump towards the LAM (avoiding the explosive barrels immediately below you). Disarm the 1 LAM and pick it up. Now it is time to learn a new skill: LAM climbing.
To scale walls which are otherwise not passable, you need 2 LAMs (or indeed you could use any of the other grenades as well, but I generally refer to this method as using LAMs since you should always have LAMs with you throughout the game). However first realise that this method you lets you go up walls, not back down again! What you do is crouch at the bottom of the wall and plant a LAM on it. Take care not to throw the LAM! Now walk right up to the wall and jump onto the LAM you just laid so that you are standing on it. Crouch again and lay another LAM above and slightly to the side of the first LAM. Now move onto that one, and disarm and pick up the first one again. Continue laying and retaking LAMs like this, moving slowly up the face of the wall as you do so. When you reach the top just step off the last LAM, pick it up and there you are - you have climbed the wall! If the wall has any overhangs - or ridges sticking out of it part way up, they may cause problems to this method, preventing you from going any higher.
What you must do is use LAMs in this way on the North wall near to the low wall that you would like to cross. (You can’t reach the low wall because there are too many barrels in the way). Plant the LAMs in such a way that you climb upwards but also always to the left towards the top of the low wall. You may find this a little difficult at first, but it will get easier with practice. In particular it is very dark here, so you may want to practice on a different wall before trying it here. Once you have crossed the wall, pick up one of the nearby trashcans and carry it up the ladder. From the top of the building, drop the trashcan over the edge so that it lands on the explosive barrels which were next to the low wall below. The impact will detonate the barrels. This should earn you 40 skill points (or 20 skill points twice, in fact) as well as blow a hole in the low wall. Go back down the ladder and through the hole in the wall. Now take one of the small boxes and throw it so that it is blocking the lowest of the red lasers and run round the corner of the building to safety while the alarm is sounding. (If you were lucky, however, the blast from blowing down the wall may have deactivated some of the lasers, allowing you to get past them without needing to use a crate in this way.) Meanwhile find the datacube at the other end of the alley and disarm and collect the 2 LAMs that are nearby, as well as the 1 multitool, and open the grate in the ground. Now that the alarm should have stopped go back to the lasers. Use the trashcan and the second small box to allow you to jump over the EMP field there. Before you jump, throw the small box over the field, so you can come back the same way. Then, being careful of the camera on the other side, go through the hole in the fence and round the corner to the left to get another 40 skill points. Return over the EMP field and go around the building the other way. You will find a group of 3 NSF terrorists and 3 dobermans guarding the next area. Kill all of them. This is most easily done by luring them inspanidually into the alley and killing them there. One of the terrorists is carrying a nanokey, 0-1 LAMs and 2 +/- 2 tranquilizer darts. The other two have 12 +/- 12 buckshot rounds between them.
Walk all the way around Osgood and Son’s, through the wire gate and past the ramp. There are 2 dobermans to be killed where the path comes to an end. Go up the ramp you just came past and break open the door with your combat knife. As you enter the middle of the computer room you will get 70 skill points. There are also 12 buckshot rounds under one of the desks in this room. Go back outside and climb the ladder which is next to the door. Then climb the next ladder as well, and kill the NSF terrorist sniper on the roof of the building, taking his 3 +/- 3 rounds of 30.06 ammo. If some of the terrorists from the lower floors hear you kill them as well, instead of later when I describe killing them. Walk over to the steps on the East of the roof and you will get 20 skill points. Go down the ladder and then jump over the wall to get onto the roof of the neighbouring building to the East. You will find 6 rounds of 10mm ammo here. Climb the 3 ladders to the South and kill the NSF terrorist up there. Now make your way back down the ladders, across to the Osgood and Son’s building, and up to the roof again. There are 12 NSF terrorists remaining in this building between the roof and the ground floor. Kill all of them. You can use 3 entry points: the roof (beware of the laser which sets of an alarm!), the door that you broke open a little lower down, or the entrance near the group of 3 terrorists and 3 dobermans that you killed earlier (you can open this with your nanokey). I can’t describe exactly which floors you will find them on because they will run between floors to find you when they hear the screams of one of the others. In some order, you will find the following items on their bodies: 18 +/- 18 buckshot rounds and 4 +/- 4 tranquilizer darts. The only other items of interest in the building are 12 rounds of 10mm ammo and 12 buckshot rounds, all on the floor just below the roof. You will now have as many buckshot rounds as you can carry so you can ignore the ones on the ground floor.
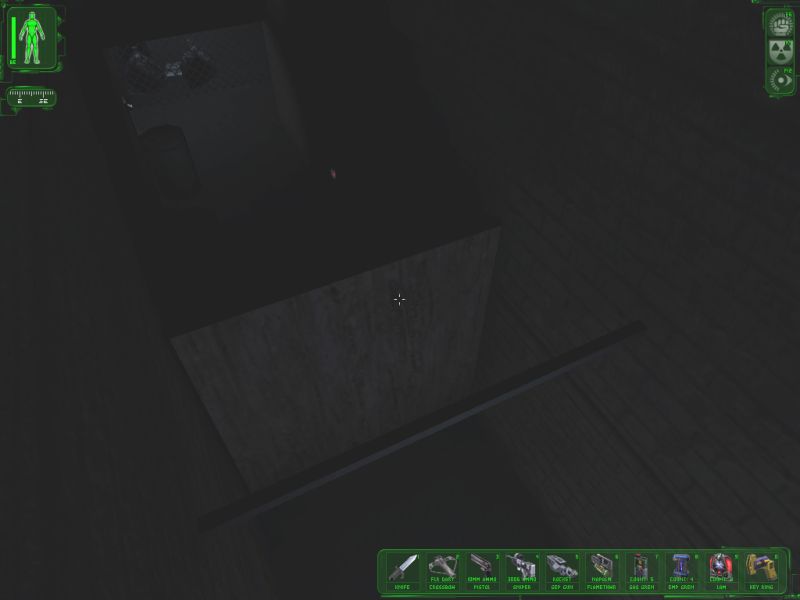
Now leave the building via the back door (using the nanokey if necessary) and walk around Osgood and Son’s until you reach the door in the ground with a keypad next to it. You can use the code you got from one of the datacubes to open the door. Go down into the basement. Go left then immediately right, then right after the barrel where you can hide from the cameras. Find the datacube in this hiding spot. Leave this spot by going to the left (where you came from). Then turn right, duck below the laser and then right again next to another barrel to wait until the cameras are not facing you. Keep going until you reach the corner in the passage and turn right. You will see a door on your right further along here, go through it into the room beyond. You will get 60 skill points for entering this room. Take the nanokey, open the crates and take the 2 LAMs, then hack into the security computer terminal and switch off all the cameras and set the turret to enemies. Now move (push) the nearby explosive barrel (with a yellow label not the one with a red label) next to the locked safe in this room. Don’t worry about setting off the alarm by going through the lasers while getting the barrel. Open the other door in the small room from the inside (it opens or closes as soon as you approach it) and then push the red-labelled explosive barrel towards this open door so that it is in the way of the door closing:
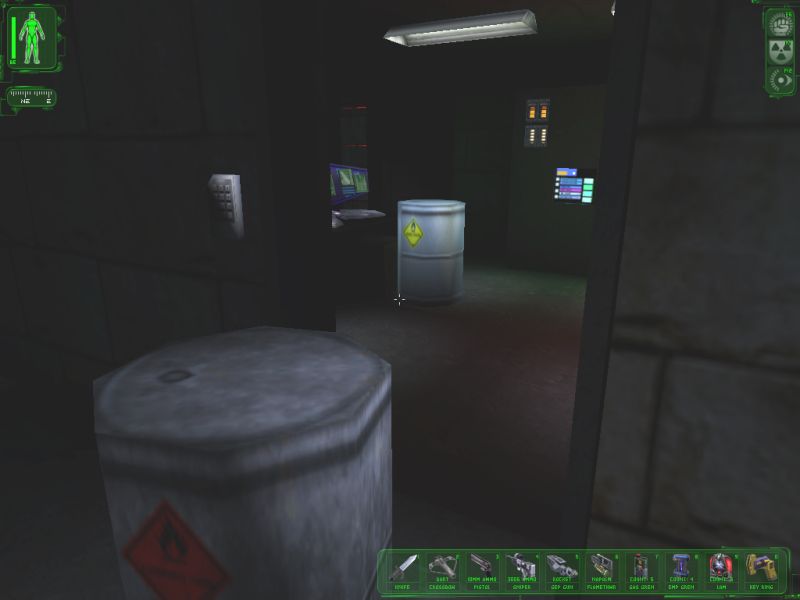
From outside the room continue to push the red-labelled barrel further through the door until suddenly the door will close once you are far enough in. As soon as it begins to shut run away from the door because it will detonate the red-labelled barrel which will in turn detonate the more powerful yellow-labelled barrel to blow open the safe. You will inevitably lose health here, but don’t worry about it because you will soon be visiting some medical bots. As an example I took damage on my right leg, which went down to 49% health. In order to pick up the augmentation canister, temporarily drop your 1 mini-crossbow. Now exit the basement and get back to the alley in the Southeast where you blasted through a wall earlier. The aim here is to return to the medical bots in the Free Clinic in order to install the augmentation before leaving the level so that you can take as many other items with you as possible. Normally it wouldn’t be possible to return to Hell’s Kitchen from here. However you can in fact use 2 LAMs to climb over the wire fence to the East using the same LAM climbing method that you used earlier to scale the low wall nearby:
This particular fence does have a ridge which may cause some difficulty in letting you climb over it - the bar across the top. However, in this case all you have to do is move slightly away from the wall and you can pass this ridge without falling off your LAM. When you are across the fence, you could go up the ladder and down the lift on the roof, but a quicker route would be to practice some more LAM climbing and go over the next fence as well. Whichever route you choose, you will find yourself back in Hell’s Kitchen.
NYC - Hell’s Kitchen
Head to the Free Clinic and go inside.
NYC - Free Clinic
Enter the room with the medical bots and use them to install the speed enhancement augmentation. Of course, if you somehow took any damage earlier on, then by all means replenish your health too! Leave the Free Clinic.
NYC - Hell’s Kitchen
Just go back to Osgood and Son’s and once again use whichever route you feel like to get back to the basement where you found the augmentation canister in the first place.
NYC - Warehouse District
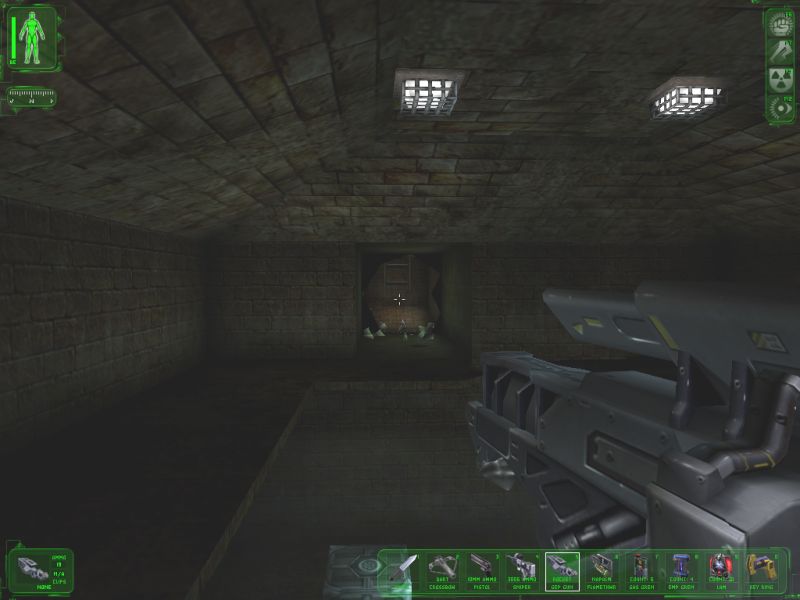
Pick up the 1 mini-crossbow that you had dropped. Go out of the door facing the red-labelled barrel and turn left 3 times, always crouching under lasers to avoid them. Be careful not to be spotted by those of the cameras which are still active. Turn right and keep going until you get to the door on your left. Open it with your nanokey and open the crates in there. One of them contains 6 rounds of 10mm ammo. Leave through the same door, choose the route to the left and find a further 6 rounds of 10mm ammo in an alcove on the left. Exit the basement and return to the grate in the ground in the alleyway to the Southeast. Go down the hole. Use the GEP gun to fire 1 rocket round at the far wall (the section which is clearly weakened):
You will get 20 skill points for blowing down the wall. There is also a datacube through there. Now return to the pool and use the pipe to cross over to the valve. Turn the valve. Don’t bother with the crate in the water. Take a breath of air and then swim through the opening created by the valve. Keep going as quickly as possible to the other end and reach the surface again. You will inevitably lose health here, but so long as you survive don’t worry about it. You should have received 20 skills points halfway through the water pipe. Once you are out of the water login to the security computer terminal with the details from the datacube and turn off all the cameras, open and unlock the door, and switch all the turrets to enemies. Go all the way to the end of the brick-walled corridor to collect 30 skill points. Don’t worry about walking through the lasers. When you reach the end return again and now go through the hatch which you opened using the security computer terminal. One of the turrets in this area is still live and hostile so watch out for that (not the one nearest to you though). Find the room in the basement which had some rockets in it (not the one where the augmentation canister was - the other one) and pick up 1 rocket round to make up for the one you just fired at the wall. Now exit the basement again and make your way up one flight of stairs from the ground floor of Osgood’s. Return to the room in the North West corner of this floor with the computers in it. Login to the personal computer terminal (you got the details from a datacube earlier). Choose the option to shut down the generator’s cooling. You will get a big reward of 500 skill points for this. Make your way up to the roof of the building where Agent Hermann will be waiting for you. Board the helicopter and go back to base.
NYC - Liberty Island
If you already have the maximum 10 LAMs then you don’t need to worry about this. However, if you only have 8 or 9, it is possible to get some more in the statue. You will find that the UNATCO troopers by the gate tell you that the rest of the island is off limits. You can use the trick with the LAMs to climb over the walls anyway. You will at first be discouraged thinking that there is an invisible wall continuing above the visible wall to the HQ, but this only extends a short height above it. Then you can safely drop down to the ground outside the compound. The island is slightly different to the way you will remember it! Don’t think about hacking the ATM in the statue because you cannot get inside the building. However, on one of the upper levels, where there once were gas grenades placed in doorways there are now 2 LAMs situated there instead:
To get up to them you once again need to use the LAM climbing method. I did this up the wall next to the main door to the statue. Then go up the two ramps and ahead of you is a LAM! Take the 2 LAMs and then head back to just above the main door. You can drop down to a ledge before dropping to the ground, this will lessen the damage you take in the final drop. You should also activate your speed augmentation while doing the large drop. Return to the UNATCO compound by scaling the wall again.
Go over to the communications van and enter it (the same code as previously). There is a datacube on the table there. Also find 1 multitool in the hatch in the ground outside. If you go behind the communications van you will find a lockpick, but you can’t carry anymore so leave it for now. Now enter the UNATCO HQ building and go down the stairs. You might hear one of the UNATCO troopers by the entrance tell you: “Piece of gossip: Anna Navarre likes your style. Heh-heh… I bet you guys would make a nice couple”. Obviously she likes you killing every single one of the enemies 🙂
NYC - UNATCO HQ
Proceed along the corridor and through the retinal scanner, coming out on level 1 of the HQ. Take the 4 tranquilizer darts from the office on the right, then go down the stairs to level 2. If you hack the ATM in the break room you can withdraw 1125 credits! There is also a datacube on a table in here. There are 6 rounds of 10mm ammo in a crate in one of the closets in the hallway (open it with your nanokey). Go into Manderley’s reception area and speak with Navarre. Go into his office when he is ready. Speak with Manderley and get your payment of 1200 credits. Now take both the nanokeys in the room. Go down to level 3. Take the 1 bioelectric cell and 4 darts that you find in Anna Navarre’s office and watch the interrogation of the prisoners. Now temporarily drop your combat knife and speak with Sam Carter to get an accuracy weapon modification. Apply it to your pistol. Don’t worry that it says you can’t carry anything else right now. (Indeed there is a bug in the game here - Sam Carter will drop the 2 multitools that he was trying to give you by your feet. If you speak to him again the same thing will happen… You can generate an infinite number of multitools in this way. But we are not going to exploit that here as you already have 20 anyway.) Pick your combat knife back up. Go into the computer ops room and check the secret area by the desk again to get 100 credits. Now go to speak to Jaime Reyes. Use the medical bot there to recover your health. Go back up to level 2 and fire 1 rocket round at the cabinet in the conference room with the GEP gun. Hide in one of the closets while the troopers come looking for you. Once they give up their search they will be friendly towards you again so you can come out from hiding. Take the recoil weapon modification that was in the cabinet and apply it to your pistol. Now make your way out of the HQ building.
NYC - Liberty Island
Board Jock’s helicopter.
Statistics
| Items | Minimum Collected | Maximum Collected | Used Up / Dropped |
|---|---|---|---|
| skill points | 910 | n/a | 0 |
| credits | 2425 | n/a | 0 |
| weapon modifications | 2 | n/a | 2 |
| accuracy | 1 | n/a | 1 |
| recoil | 1 | n/a | 1 |
| augmentations | 1 | n/a | 1 |
| datacubes | 6 | n/a | n/a |
| nanokeys | 4 | n/a | n/a |
| enemies killed | 26 | n/a | n/a |
| dobermans | 5 | n/a | n/a |
| NSF terrorists | 21 | n/a | n/a |
| ammo total | 33 | 133 | 2 |
| buckshot rounds | 0 | 20 | 0 |
| darts | 4 | 4 | 0 |
| LAMs | 8 | 8 | 0 |
| rocket rounds | 1 | 1 | 2 |
| rounds of 10mm ammo | 0 | 42 | 0 |
| rounds of 30.06 ammo | 18 | 42 | 0 |
| tranquilizer darts | 0 | 16 | 0 |
| other important items | 5 | n/a | 0 |
| bioelectric cells | 3 | n/a | 0 |
| multitools | 2 | n/a | 0 |